Side Project를 진행하면서 DB서버 구축하는 데에 편의성을 높이기 위해 Firebase를 사용하기로 했다.
예전에 안드로이드 프로젝트를 했을 때 Firebase를 사용해서 채팅 기능을 간편하게 구현했는데,
이번 프로젝트에서도 용이하게 쓰였으면 좋겠다..!!
1. CocoaPods 설치
CocoaPods는 Swift나 Object-C 프로젝트에 필요한 라이브러리들을 관리하는 곳이다.
CocoaPods.org
CocoaPods is built with Ruby and is installable with the default Ruby available on macOS. We recommend you use the default ruby. Using the default Ruby install can require you to use sudo when installing gems. Further installation instructions are in the g
cocoapods.org
$ sudo gem install cocoapods터미널에서 명령어를 입력해 CocoaPods를 설치한다.
$ pod --version정상적으로 설치가 되었으면 버전을 확인할 수 있다.
2. Firebase Project 생성
Firebase
Firebase는 고품질 앱을 빠르게 개발하고 비즈니스를 성장시키는 데 도움이 되는 Google의 모바일 플랫폼입니다.
firebase.google.com
시작하기 -> 프로젝트 추가 +
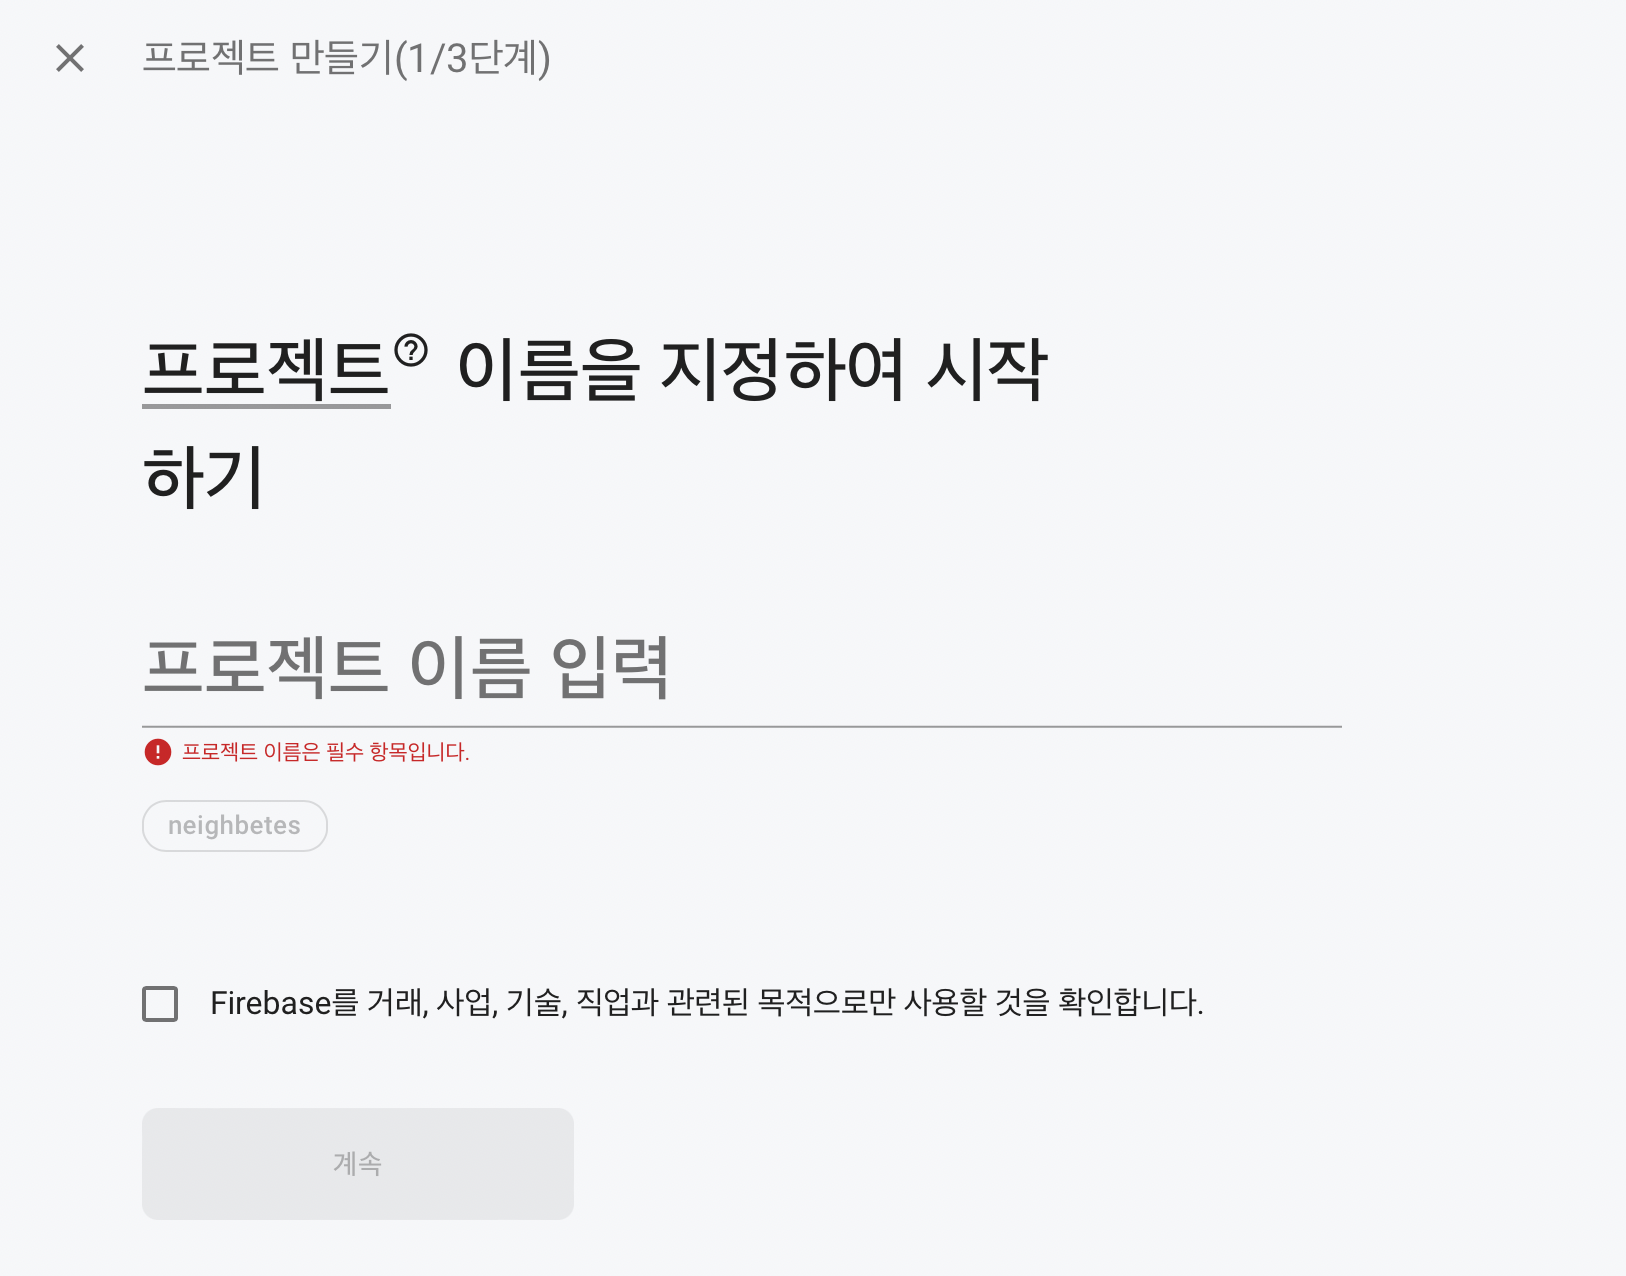
프로젝트 이름을 입력하고 체크박스에 체크 -> 계속

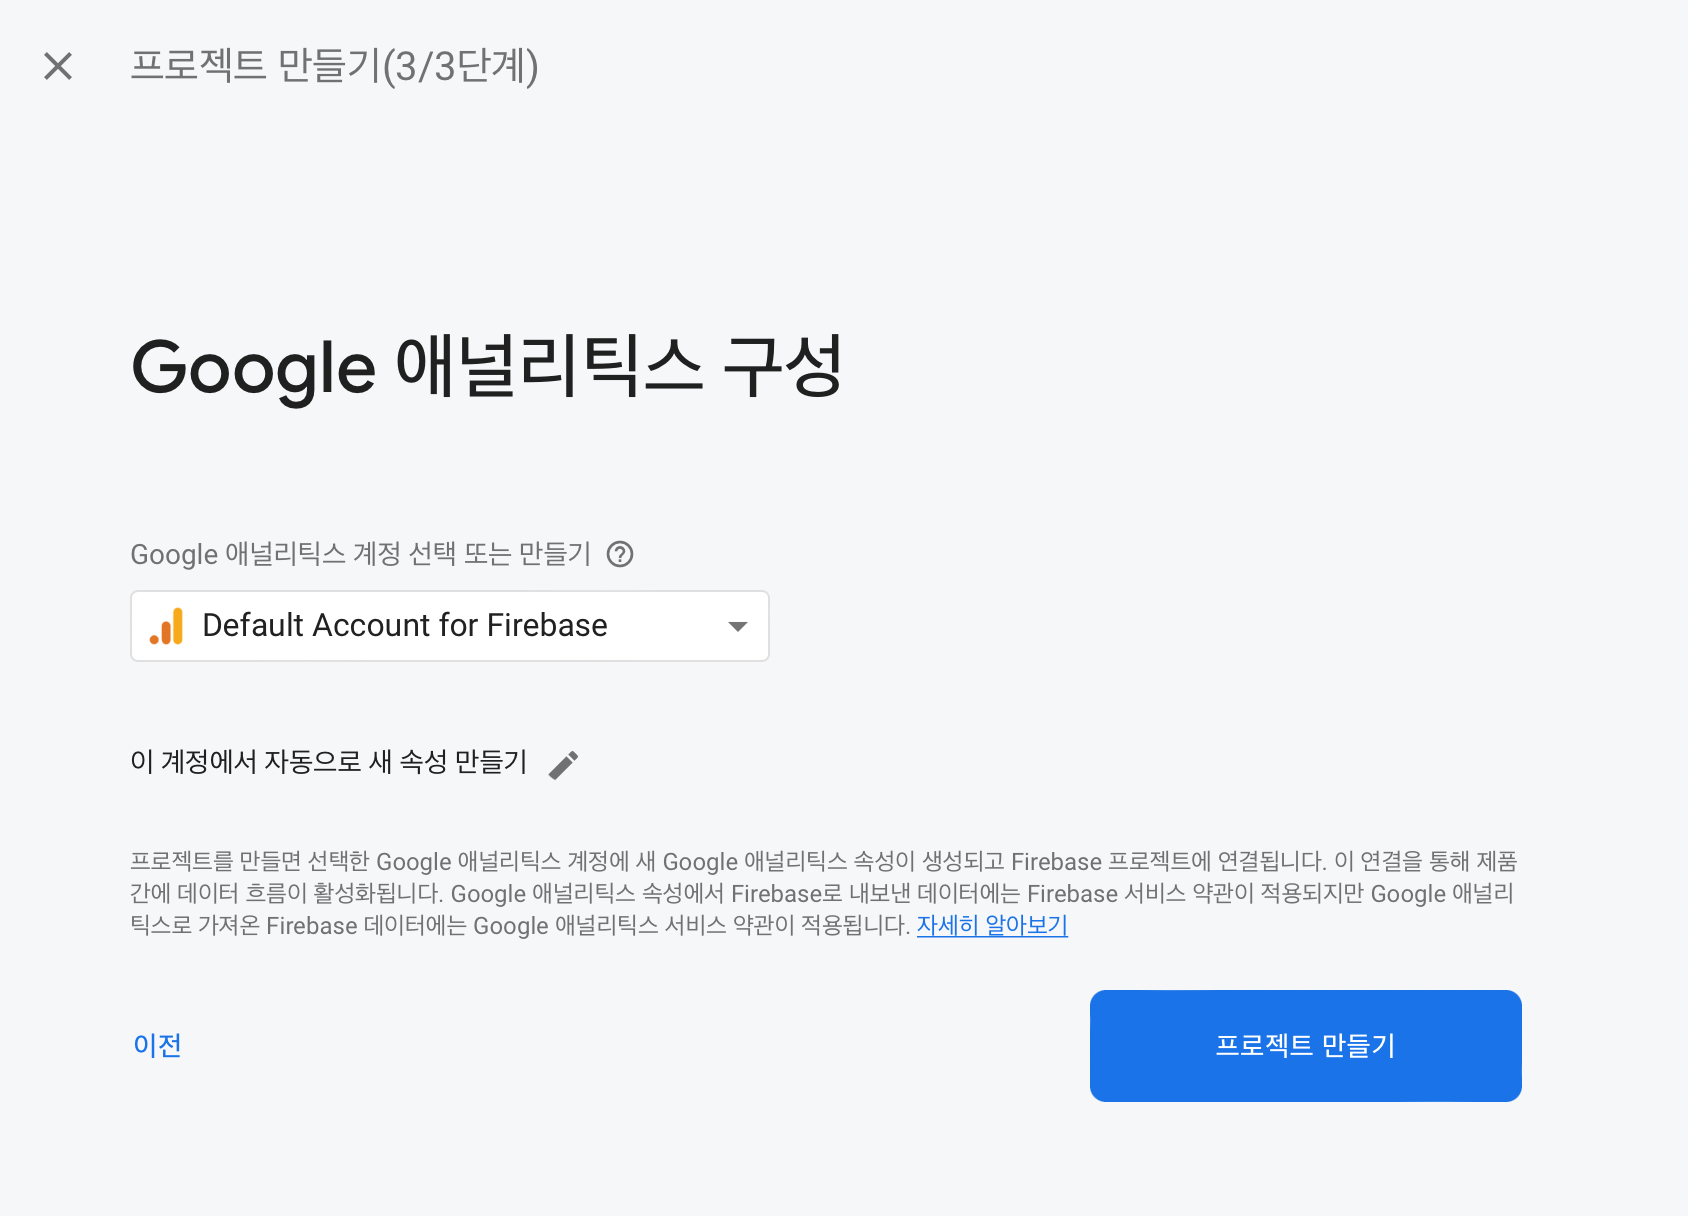
프로젝트 만들기 버튼을 누르면 Android나 Swift 등등 프로젝트에 연결할 수 있는 Firebase 프로젝트가 생성된다.
3. Project 연결

생성한 Firebase 프로젝트 메인 화면에서 iOS를 선택한다.
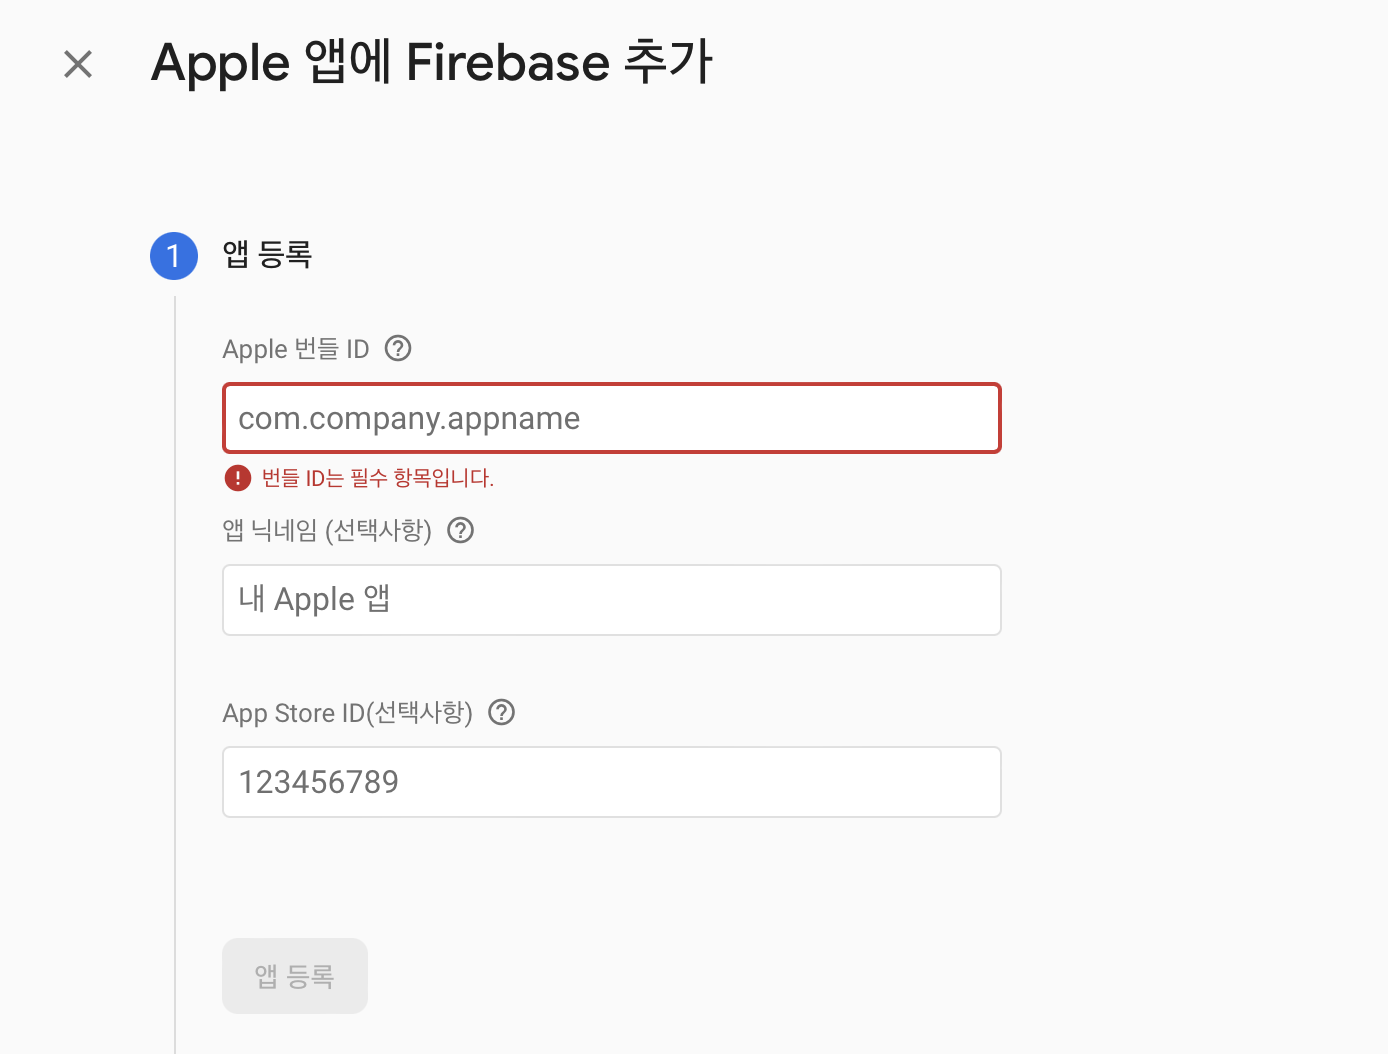
Apple 번들 ID는 XCode에서 왼쪽 프로젝트 이름 클릭 -> General -> Bundle Identifier 확인할 수 있다.
앱 닉네임과 App Store ID는 선택사항으로 입력해도 되고 안 해도 된다.
앱 등록 버튼 클릭.
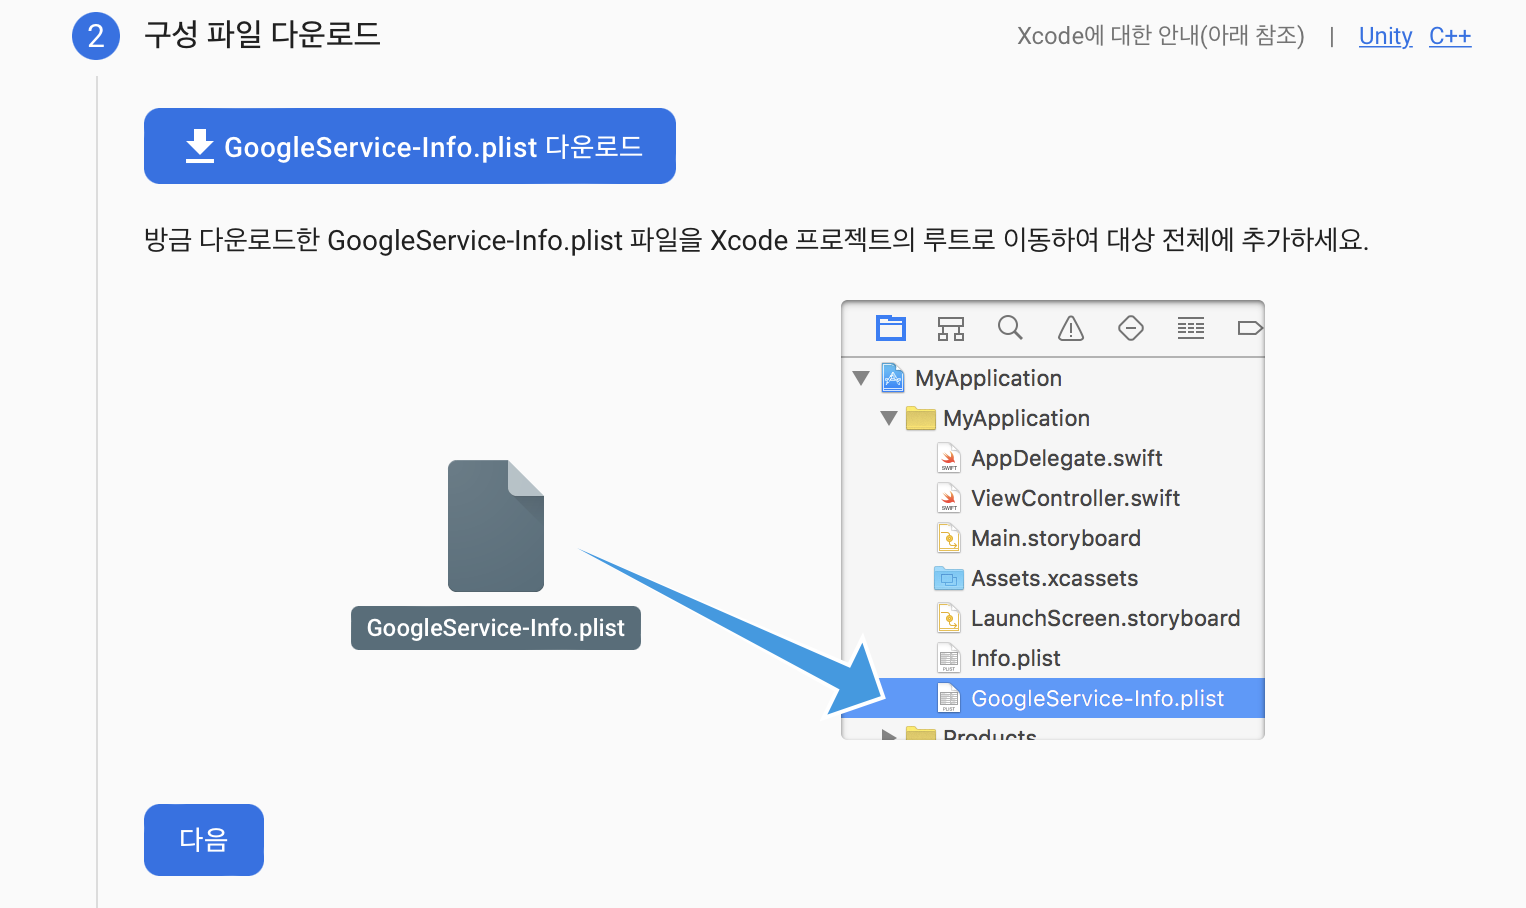
파일을 다운로드하고 프로젝트 내에 넣는다.
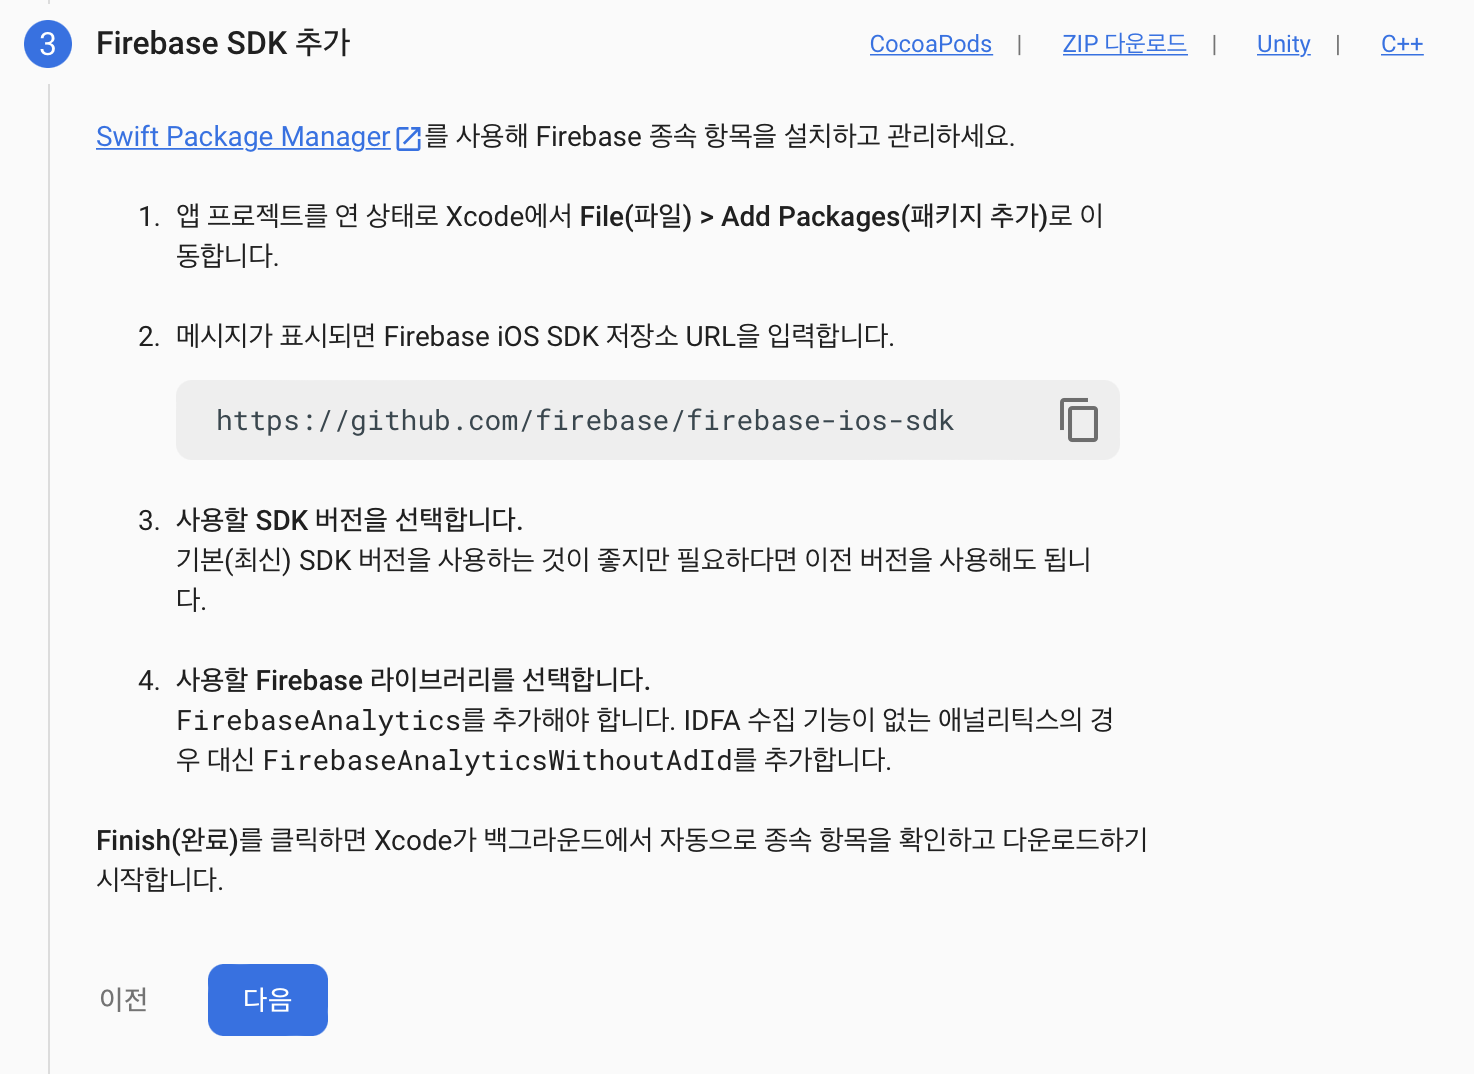
예전에 쓰인 다른 게시글들을 보면 이 부분에서 CocoaPods를 사용해서 SDK를 추가하게 했는데 이 방법으로도 추가할 수 있다.
Firebase가 알려준 방법대로 Xcode File -> Add Packages -> URL을 검색 -> Add Package -> FirebaseAnalytice 체크 Add Package

설치했던 CocoaPods에서도 제공하는 라이브러리들을 빠르게 추가할 수 있으니까 이 부분은 다음에 이용해봐야겠다!

AppDelegate 파일을 열어서 잘 복사 붙여넣기 해준다.
import UIKit
import Firebase

@main
class AppDelegate: UIResponder, UIApplicationDelegate {

    func application(_ application: UIApplication, didFinishLaunchingWithOptions launchOptions: [UIApplication.LaunchOptionsKey: Any]?) -> Bool {
        // Override point for customization after application launch.

        // Firebase 초기화 코드 추가
        FirebaseApp.configure()

        return true
    }

    // MARK: UISceneSession Lifecycle

    func application(_ application: UIApplication, configurationForConnecting connectingSceneSession: UISceneSession, options: UIScene.ConnectionOptions) -> UISceneConfiguration {
        // Called when a new scene session is being created.
        // Use this method to select a configuration to create the new scene with.
        return UISceneConfiguration(name: "Default Configuration", sessionRole: connectingSceneSession.role)
    }

    func application(_ application: UIApplication, didDiscardSceneSessions sceneSessions: Set<UISceneSession>) {
        // Called when the user discards a scene session.
        // If any sessions were discarded while the application was not running, this will be called shortly after application:didFinishLaunchingWithOptions.
        // Use this method to release any resources that were specific to the discarded scenes, as they will not return.
    }


}
제일 상단에 import Firebase 한 줄,
func application 함수 중 launchOptions 파라미터를 갖는 함수 안에 FirebaseApp.configure()를 추가하면 끝 !
2년 전 안드로이드 프로젝트를 연결했을 때는 마지막 단계에서 앱을 실행시키고 되게 오래 기다리고 연결이 잘 안 됐는데 이번에는 아주 빠르게 연결이 되었다.
굿굿
'DEV - iOS > iOS' 카테고리의 다른 글
| [Swift] Firebase Auth 로그인 기능 (0) | 2022.04.27 |
|---|---|
| [Swift] iOS 프로젝트에 Firebase 연동하기 2 - Realtime Database (0) | 2022.04.11 |
| [XCode / Error] Unable to boot device because it cannot be located on disk (0) | 2022.04.06 |
| [Swift] 스위프트 기본 문법 공부(8) - Properties (0) | 2022.02.18 |
| [Swift] 스위프트 기본 문법 공부(7) - Class(참조 & 상속) (0) | 2022.02.17 |